Are you planning to install Windows XP on your computer but don’t have a CD/DVD drive? You don’t have to worry because you can easily install Windows XP using a bootable USB drive. In this article, we will guide you on how to install Windows XP from a bootable USB drive step by step. But before you do anything download and check the USB Drive status using h2testw.
Installing Windows XP from a bootable USB drive is a convenient way to install the operating system without having to use a CD/DVD drive. Creating a bootable USB drive is easy and requires only a few steps. By following this guide, you can easily install Windows XP from a bootable USB drive.
Requirements for Creating a Bootable USB Drive
To create a bootable USB drive for Windows XP installation, you will need the following:
- A USB flash drive with a minimum capacity of 1 GB
- Windows XP installation files
- A computer with Windows operating system
- A software for creating bootable USB drive (e.g., Rufus)
Creating a Bootable USB Drive for Windows XP Installation
Follow these steps to create a bootable USB drive for Windows XP installation:
- Insert the USB flash drive into the computer’s USB port.
- Download Rufus and install it on your computer.
- Run Rufus and select the USB flash drive from the Device dropdown menu.
- Select the file system as NTFS and the cluster size as 4096 bytes.
- Check the box next to “Create a bootable disk using” and select “ISO Image” from the dropdown menu.
- Click the small CD drive icon next to “ISO Image” and browse to the location of the Windows XP ISO file.
- Click “Start” to begin the process of creating a bootable USB drive.
Setting up the BIOS to Boot from the USB Drive
Before installing Windows XP from the bootable USB drive, you need to set up your computer’s BIOS to boot from the USB drive. Follow these steps to do so:
- Restart your computer and enter the BIOS setup by pressing the designated key (usually F2, F12, or Delete).
- Go to the Boot tab and change the boot order so that the USB drive is the first boot device.
- Save the changes and exit the BIOS setup.
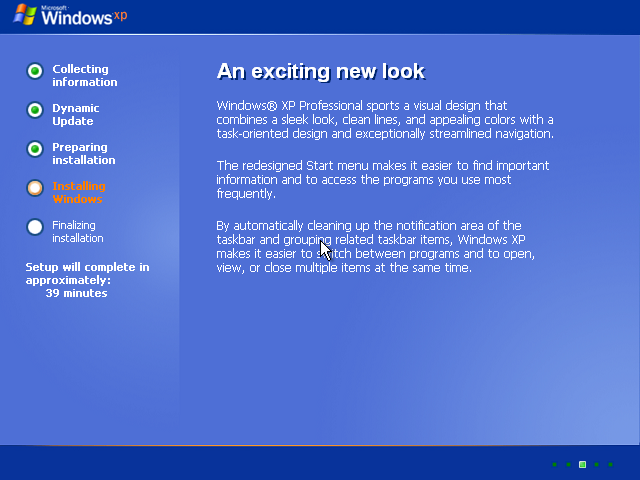
Installing Windows XP from the Bootable USB Drive
Now that you have created a bootable USB drive and set up the BIOS to boot from it, you can begin the process of installing Windows XP. Follow these steps:
- Insert the bootable USB drive into your computer’s USB port.
- Restart your computer and wait for the Windows XP setup to load.
- Press Enter to start the setup process.
- Accept the license agreement and select the partition where you want to install Windows XP.
- Follow the on-screen instructions to complete the installation process.
Installing Drivers and Software
After installing Windows XP, you need to install the necessary drivers and software for your computer to function properly. Follow these steps to install drivers and software:
- Download the necessary drivers and software from the manufacturer’s website.
- Install the drivers and software one by one.
- Restart your computer after each installation.
Activating Windows XP
To fully use Windows XP, you need to activate it within 30 days of installation. Follow these steps to activate Windows XP:
- Click on the Start menu and select “Run”.
- Type “regedit” and press Enter.
- Navigate to “HKEY_LOCAL_MACHINE\Software\Microsoft\Windows NT\CurrentVersion\WPAEvents”.
- Double-click on the “OOBETimer” entry and change at least one digit of the value.
- Click “OK” and close the registry editor.
- Click on the Start menu and select “Run” again.
- Type “%systemroot%\system32\oobe\msoobe.exe /a” and press Enter.
- Select “Yes, I want to telephone a customer service representative to activate Windows”.
- Follow the on-screen instructions to activate Windows XP.
Conclusion
In conclusion, installing Windows XP from a bootable USB drive is a simple process that can be done by following the steps outlined in this guide. By creating a bootable USB drive and setting up the BIOS to boot from it, you can easily install Windows XP on your computer without a CD/DVD drive. Make sure to also install the necessary drivers and software after installing Windows XP to ensure your computer functions properly.
FAQs
- Can I use a USB drive with a capacity less than 1 GB to create a bootable USB drive for Windows XP installation?
- No, the USB flash drive needs to have a minimum capacity of 1 GB.
- Do I need to purchase Windows XP to install it from a bootable USB drive?
- Yes, you need to have a valid license key to activate Windows XP.
- Can I use Rufus to create a bootable USB drive for other operating systems?
- Yes, Rufus supports creating bootable USB drives for various operating systems, including Windows, Linux, and macOS.
- What should I do if I encounter errors during Windows XP installation from the bootable USB drive?
- Make sure that the USB drive is properly formatted and that the Windows XP installation files are not corrupted. You can also try using a different USB drive or software to create the bootable USB drive.
- Can I use the same bootable USB drive to install Windows XP on multiple computers?
- Yes, you can use the same bootable USB drive to install Windows XP on multiple computers, as long as you have a valid license key for each installation.