Pendrives, also known as USB flash drives, are one of the most convenient ways to store and transfer data. However, sometimes, these devices may become write-protected or read-only, preventing users from making any changes to the files stored on them. In this article, we will discuss the possible reasons behind this issue and the methods to fix it.
If you want to test your Pendrive Space then download h2testw. Incase you want to recover your data check this article – Best USB Flash Drive Repair Tools: Tips and Tricks to Salvage Your Data
What is Write-Protection/Read-Only Mode?
Write-protection or read-only mode is a security feature used to protect data from being accidentally deleted or modified. When this mode is enabled, you cannot write new data or delete existing data from the pendrive. This mode can be enabled either physically through a switch on the pendrive or through software settings.
Reasons for Enabling Write-Protection/Read-Only Mode
There are several reasons why you may want to enable write-protection or read-only mode on your pendrive. For instance, it can prevent the loss or corruption of important data due to accidental deletion or modification. It can also prevent the spread of viruses or malware to other devices when the pendrive is shared among different computers.
- What is Write-Protection/Read-Only Mode?
- Reasons for Enabling Write-Protection/Read-Only Mode
- Reasons for Write-Protected/Read-Only Pendrive
- 1. Switch on the Pendrive
- 2. Malware Infection
- 3. Physical Damage
- 4. Corrupted File System
- 5. Permission Issues
- 6. Hardware Issues
- 7. File System Errors
- 8. Disk Errors
- 9. Software Issues
- 10. Registry Errors
- 11. Locked Files or Folders
- 12. Corrupted Data
- 13. Compatibility Issues
- 14. Device Driver Issues
- 15. Firmware Issues
- How to Check if Pendrive is Write-Protected/Read-Only
- How to Fix Write-Protected/Read-Only Pendrive
- Conclusion
- FAQs
Reasons for Write-Protected/Read-Only Pendrive
If you’ve ever tried to modify, delete or add files to a USB drive, and encountered a “write-protected” or “read-only” error message, you’ll know how frustrating it can be. In this article, we’ll explore the most common reasons why a pendrive may be write-protected or read-only, and what you can do to fix it.
1. Switch on the Pendrive
Sometimes, a USB drive may appear write-protected or read-only because it is not properly connected to the computer or device. Ensure that the pendrive is switched on and properly plugged in before attempting to access or modify the files.
2. Malware Infection
A malware infection can also cause a USB drive to become write-protected or read-only. Malware can modify the settings of the drive and restrict the user from making changes to the files. Scan the drive for malware infections using antivirus software, and remove any detected threats.
3. Physical Damage
Physical damage to the USB drive can cause it to become write-protected or read-only. Damage to the connector, circuit board or storage chip can interfere with the data transfer and modification processes. If the drive is physically damaged, it may need to be repaired or replaced.
4. Corrupted File System
A corrupted file system on the USB drive can cause it to become write-protected or read-only. This can occur due to abrupt disconnection, power failure, or virus attacks. Use the disk repair tool to fix the corrupted file system and make the drive writable again.
5. Permission Issues
File and folder permissions can also cause a USB drive to become write-protected or read-only. The permissions may be set to restrict the user from making changes to the files. Adjust the permissions to allow modification of the files.
6. Hardware Issues
Hardware issues with the USB drive or the computer’s USB port can also cause write-protection or read-only issues. Try using a different USB port or connecting the drive to another computer to see if the problem persists.
7. File System Errors
File system errors can also cause a USB drive to become write-protected or read-only. These errors can occur due to improper ejection or sudden power loss. Use the disk repair tool to fix the file system errors and make the drive writable again.
8. Disk Errors
Disk errors on the USB drive can also cause write-protection or read-only issues. These errors can occur due to physical damage, malware infection, or file system errors. Use the disk repair tool to fix the disk errors and make the drive writable again.
9. Software Issues
Software issues on the computer can also cause a USB drive to become write-protected or read-only. These issues can occur due to outdated drivers, incompatible software, or registry errors. Update the software and drivers to ensure compatibility and resolve any software-related issues.
10. Registry Errors
Registry errors on the computer can also cause write-protection or read-only issues on the USB drive. These errors can occur due to malware infection, outdated software, or incorrect registry settings. Use a registry cleaner tool to fix the errors and make the drive writable again.
11. Locked Files or Folders
Locked files or folders on the USB drive can also cause it to become write-protected or read-only. These files or folders may be in use by another program or the operating system. Close all programs that may be using the files or folders and try again.
12. Corrupted Data
Corrupted data on the USB drive can also cause write-protection or read-only issues. This can occur due to abrupt disconnection, virus infection, or hardware issues. Use a data recovery tool to recover the corrupted data and transfer it to a new USB drive.
13. Compatibility Issues
Compatibility issues between the USB drive and the computer’s operating system or file system can also cause write-protection or read-only issues. Ensure that the USB drive is compatible with the computer’s operating system and file system.
14. Device Driver Issues
Device driver issues on the computer can also cause write-protection or read-only issues on the USB drive. These issues can occur due to outdated or corrupt drivers. Update the device drivers to ensure compatibility and resolve any driver-related issues.
15. Firmware Issues
Firmware issues on the USB drive can also cause it to become write-protected or read-only. These issues can occur due to a corrupted firmware or outdated firmware version. Update the firmware to ensure compatibility and resolve any firmware-related issues.
How to Check if Pendrive is Write-Protected/Read-Only
There are several methods to check if your pendrive is write-protected or read-only. We have listed three methods below:
Method 1: Check Physical Lock on the Pendrive
Some pendrives have a physical switch or lock that can enable or disable the write-protection mode. If your pendrive has such a switch, check if it is in the locked position. If the switch is locked, you cannot write new data or delete existing data from the pendrive. Unlock the switch to disable write-protection mode.
Method 2: Check the Properties of the Pendrive
You can also check if your pendrive is write-protected or read-only by checking its properties. Follow the steps below:
- Insert the pendrive into the USB port of your computer.
- Right-click on the pendrive icon in the File Explorer and select “Properties.”
- In the Properties window, go to the “Security” tab and check if the write-protection or read-only mode is enabled. If it is enabled, you will not be able to modify or delete data from the pendrive.
Method 3: Use Command Prompt
You can use the Command Prompt on your computer to check if your pendrive is write-protected or read-only. Follow the steps below:
- Press “Windows key + R” to open the Run dialog box.
- Type “cmd” in the box and press “Enter” to open the Command Prompt.
- Type “diskpart” and press “Enter.”
- Type “list volume” and press “Enter.”
- Find your pendrive in the list of volumes and note its volume number.
- Type “select volume [volume number]” (replace [volume number] with the volume number of your pendrive) and press “Enter.”
- Type “attributes disk” and press “Enter.”
- Check the “Current Read-only State” and “Read-only” attributes. If they are set to “Yes”, your pendrive is in read-only mode.
How to Fix Write-Protected/Read-Only Pendrive
Method 1: Check the Hardware Switch or Button
If your pendrive has a hardware switch or button, ensure that it is not in the write-protected or read-only position. Slide or press it to the opposite direction or position, and try accessing your pendrive again.
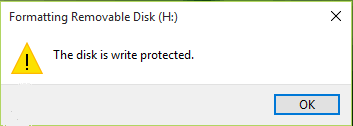
Method 2: Format the Pendrive
Formatting your pendrive will erase all the data stored on it. Therefore, create a backup of your important files before proceeding with this method. To format your pendrive:
- Connect your pendrive to your computer
- Open File Explorer
- Right-click on your pendrive
- Select “Format…”
- Select the file system type (NTFS, FAT32, exFAT, etc.)
- Check the “Quick Format” option
- Click “Start”
Method 3: Modify the Registry
Modifying the registry is a risky task, and it is recommended to create a backup of your registry before proceeding. To modify the registry:
- Press “Windows Key + R”
- Type “regedit” and press Enter
- Navigate to “HKEY_LOCAL_MACHINE\SYSTEM\CurrentControlSet\Control\StorageDevicePolicies”
- Double-click on “WriteProtect”
- Change the value from “1” to “0”
- Click “OK”
Method 4: Using Diskpart Command
Diskpart is a command-line utility that allows you to manage your disk partitions. To use Diskpart:
- Press “Windows Key + R”
- Type “diskpart” and press Enter
- Type “list disk” and press Enter
- Identify your pendrive
- Type “select disk X” (replace X with the number of your pendrive)
- Type “attributes disk clear readonly”
- Type “exit”
Conclusion
A write-protected or read-only pendrive can be frustrating and may prevent you from accessing or modifying your important files. However, by following the methods mentioned in this article, you can fix this issue and use your pendrive as usual.
FAQs
- Can I recover my data from a write-protected pendrive?
- Yes, you can recover your data from a write-protected pendrive using data recovery software.
- Will formatting my pendrive remove the write-protection?
- Yes, formatting your pendrive will remove the write-protection.
- What if my pendrive does not have a hardware switch or button?
- Try the other methods mentioned in this article to fix the issue.
- Is it safe to modify the registry?
- Modifying the registry is a risky task, and it is recommended to create a backup of your registry before proceeding.
- What if the methods mentioned in this article do not work?
- If the methods mentioned in this article do not work, you may need to replace your pendrive.